by Amit Ramani/ @anterikinc
Import Data from Microsoft Dynamics POS to Quickbooks POS
My project for the day was migrating from Microsoft Dynamics to Quickbooks POS. This involves a procedure to import data (including Customers, Inventory, Vendors) from Microsoft Dynamics POS into Quickbooks POS. For those of you unfamiliar with this, POS stands for Point-Of-Sale. The simple POS’es are the ones at the grocery store cash registers where the clerks scan the merchandise and ring you up.
About Microsoft Dynamics
Microsoft Dynamics is an older POS software suite. It is quite popular within the small-business community. One of my clients has a POS that uses Microsoft Dynamics. As part of their expansion, the client purchased a new POS system for their new location, a mobile showroom.
About Quickbooks POS
Quickbooks is the relatively new entrant to this market. The big advantage with Quickbooks is that it can easily integrate with other Quickbooks software, including Quickbooks Accounting, Quickbooks Pro and sync up inventory with Quickbooks web connector for online ecommerce sites.
While I do not know what format Quickbooks POS uses for storing its data, it does have a very handy utility for importing the following:
- Inventory
- Customers
- Vendors
That said, it also includes some very useful templates with lots of instructions. The QB POS Template is an Excel spreadsheet containing one worksheet each for Inventory, Customers and Vendors.
Extracting Data from Microsoft Dynamics POS
There are two ways to extract data out of Dynamics POS
1. Using Inventory reports under Reports menu in the Management View/Console
2. SQL Queries to get raw data back from database.
With either step, you will need to Export the data to Excel xls spreadsheet or CSV files. At first, I used Reports method for extracting the data. However, after a dry run with importing into Quickbooks POS, I discovered a problem. Reports does not provide access to several internal fields, related to product/items in the inventory. In my case, I was not able to get the “Bar Code Number” for each product. That field is absolutely needed when importing into QB POS, because it is used as the unique identifier.
Step-By-Step Guide for Exporting Data from Microsoft Dynamics POS
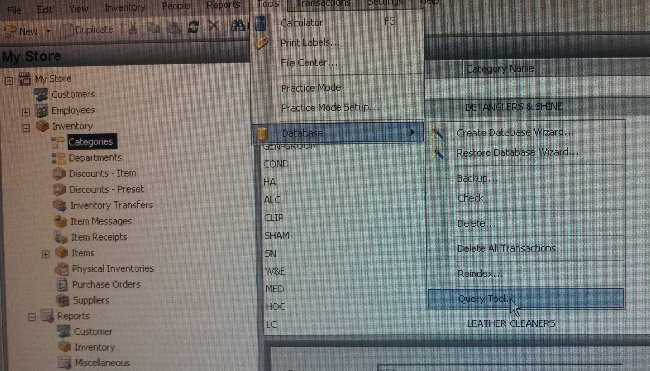
Step 1. Access the Query Tool via Menu->Tools->Database->Query Tool…
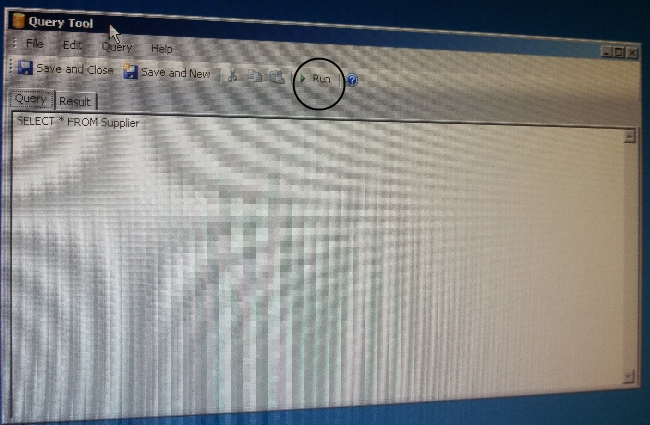
Step 2. Type the SQL Query in the Query Tool Window and click on the Run button
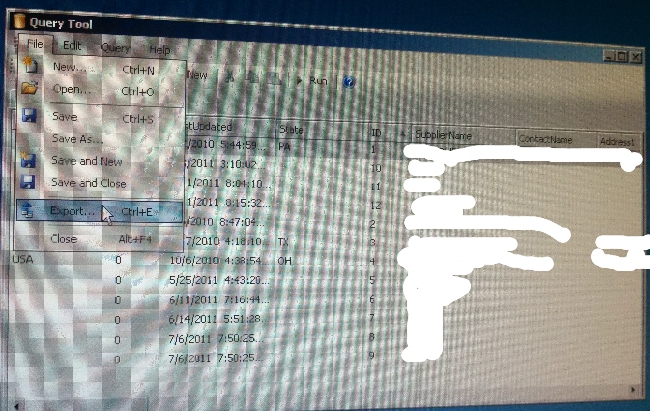
Step 3. Click on Results tab and Export to desired format (Excel, CSV etc)
SQL Queries to get raw data back from database
Running SQL Queries is not intended to be used for those not versed with atleast a cursory knowledge of database queries. The SQL syntax is straight-forward once you get used to it.
For example, for getting all vendors info, here is the query I used:
SELECT * FROM Supplier
This query will return all the info related to Suppliers, which can then be exported to Excel. This Excel spreadsheet can be used for importing into Quickbooks POS. See below for Step-By-Step instructions on importing “Vendors”.
Similarly, to get all Departments, use the following query
SELECT * FROM Department
For obtaining all customers, simply type this query
SELECT * FROM Customer
For items, its not as straightforward. The trick here is to get verbose Category names and Supplier names for each item. The standard query only provides numeric Category ID’s and Supplier IDs. It does not provide the names of the Supplier or the name of Category that the item belongs to.
Here is the query I used and it worked quite nicely
SELECT <place all columns name that you need from each of tables here> FROM Item i LEFT OUTER JOIN Category c ON c.ID = i.CategoryID LEFT OUTER JOIN Supplier s ON s.ID = i.SupplierID
My specific query to retrieve all items with corresponding Supplier Names and Category Names :
SELECT Description, ItemLookupCode, Price, SalePrice, Cost, Quantity, ReorderPoint, SupplierID, ExtendedDescription, SubDescription1, SubDescription2,SubDescription3, BarCodeNumber, c.Name AS CategoryName, s.Name AS SupplierName FROM Item i LEFT OUTER JOIN Category c on i.CategoryID = c.ID LEFT OUTER JOIN Supplier s ON i.SupplierID = s.ID
This query will give you all the items along with their corresponding Supplier Names as well as Category/Department names.
From the Results window, choose File->Export. Name your exported file in a detailed manner consistent with the query. You can now take the CSV or XLS file and use it for import into QB POS.
Step-By-Step Guide for Importing Records into Quickbooks POS
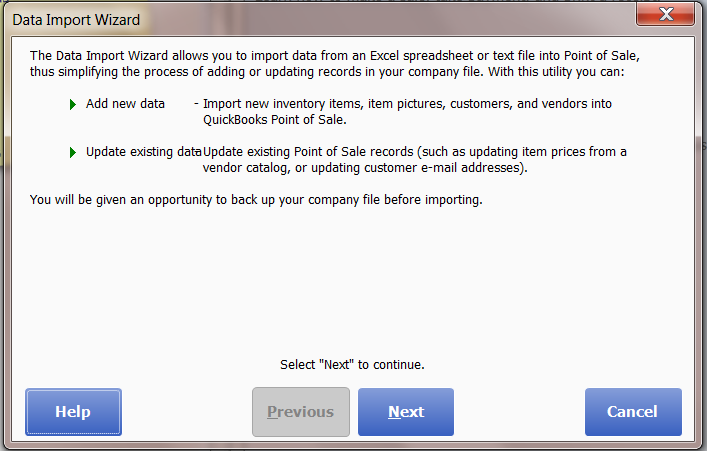
1. First select the Data Import Wizard from “File->Utilities->Import” from the main menu.

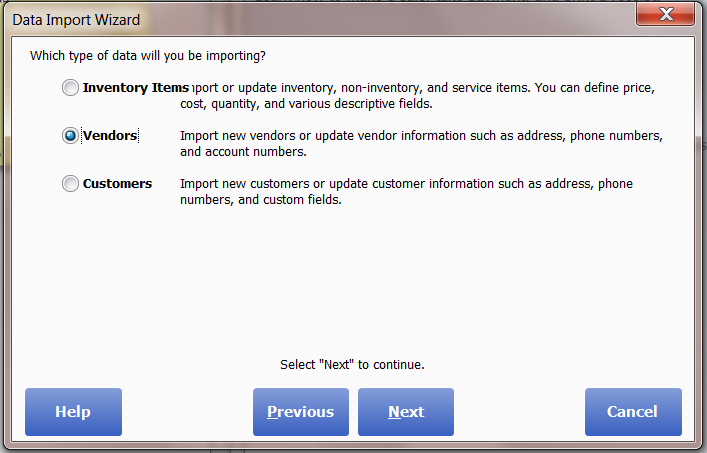
2. The Data Import Wizard window appears. Click Next.
3. Select “Vendors” and click Next
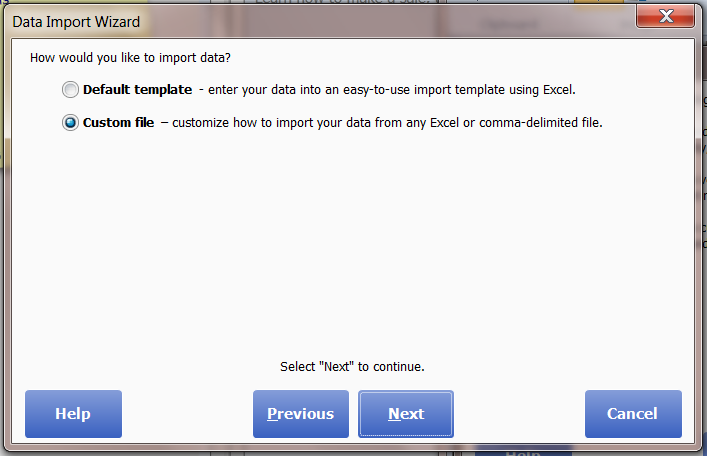
4. Then select “Custom File” and click Next. Be sure to select “Custom File” and NOT “Default Template”.
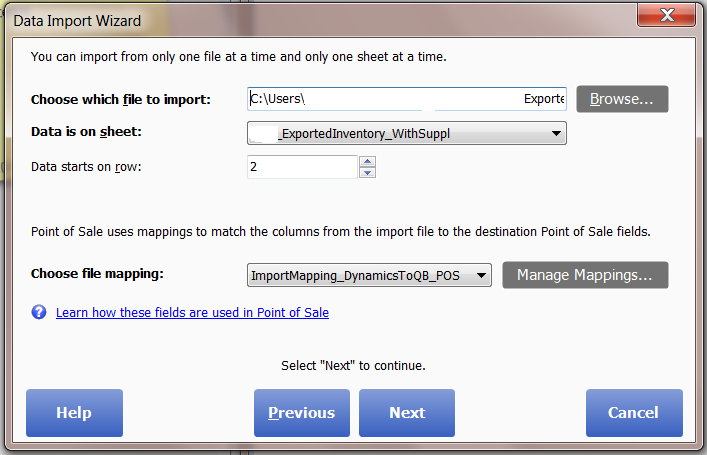
5. Click on Browse. Then select your spreadsheet file. Select the correct worksheet under “Data is on Sheet:”.
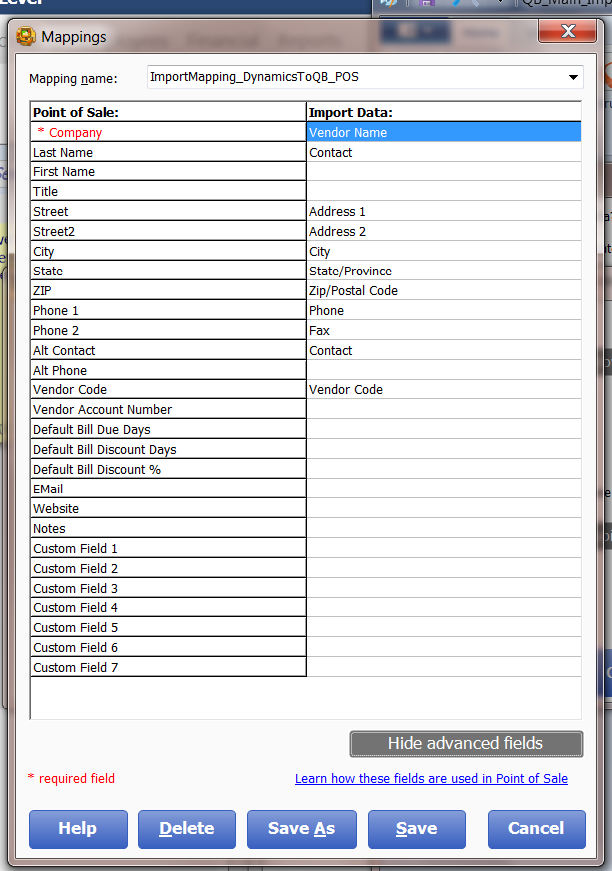
6. Now, click on “Manage Mappings“. Here you will manually select the mappings between your spreadsheet columns and the Quickbooks Template. Pay special attention to “Required” fields, highlighted in Red. Give the Mapping a name so you can use it in the future.
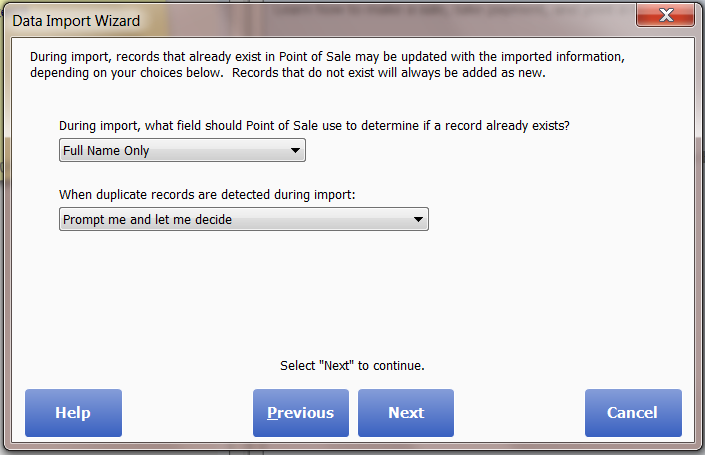
7. Select “Full Name Only” and “Prompt me and let me decide”. This sets the action Quickbooks will take for determining duplicates and what to do in case it finds duplicates.
8. The next window will show you how many vendors are contained in the file, if there were any errors processing the file, number of vendors that will be added and number of vendors that will be updated.
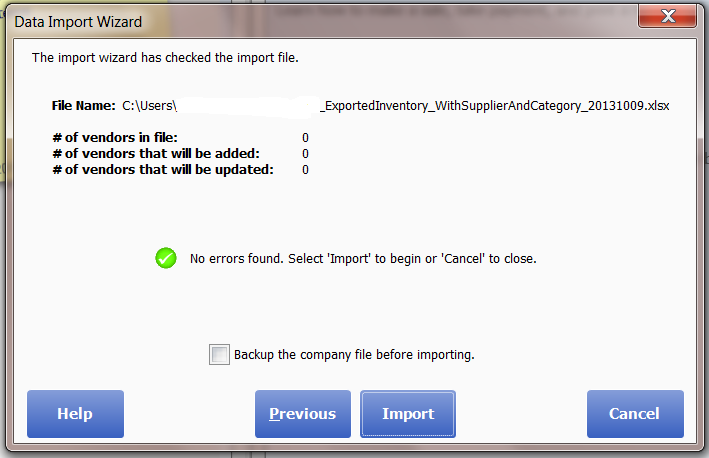
Voila! You are done importing vendors.
You will follow the same general guidelines/steps for importing Customers and Inventory items. If you have any questions, feel free to ask below.
Happy Importing!
by Amit Ramani/ @anterikinc
Leave a Reply